Recording
Capture modes, webcam, audio, teleprompter, and keyboard sounds — every option in the recording bar, explained.
The recording bar is the one UI surface you see before every capture. Capture modes on the left, record button in the middle, input toggles on the right. Everything here gets baked into the raw recording; everything else happens in the editor.
Capture modes
Three capture modes. Pick one from the recording bar or from the Record menu.
| Mode | Shortcut | What it captures |
|---|---|---|
| Display | ⌘⌥3 | An entire display, including menu bar and dock |
| Window | ⌘⌥4 | A single app window, cropped tightly, even if partially occluded |
| Area | ⌘⌥5 | A freeform rectangle you draw on screen |
The menu shortcuts pick the mode and start recording. The bar buttons just set the mode — you still have to hit record.
Display
Captures an entire display at native Retina resolution. With multiple monitors Screen Bolt defaults to your main display; switch by selecting a different one in the picker. Best for tutorials where you want window switching or anything involving more than one app.
Window
Click Window and a picker shows every open window — including off-screen and hidden ones — with thumbnails. Select one and Screen Bolt records just that window using desktop-independent capture:
- The frame crops to the window's bounds, not the whole screen.
- Other windows in front of it don't appear in the output.
- The window can move or resize mid-recording; the capture follows.
Best for demos of a single app.
Area
Click Area and the screen dims. Drag a rectangle, adjust edges or corners, press ↵ to confirm or Esc to cancel. That region becomes the recording frame. Screen Bolt remembers it across recordings in the same session. Best for anything where the full display is too much.
Webcam
Enable the webcam from the Camera toggle on the right side of the recording bar. A live thumbnail appears above the toggle so you can check framing before you record.
- Pick the device under Settings → Recording → Camera. The dropdown lists every connected video input, including USB webcams, Continuity Camera (iPhone), and Studio Display.
- Resolution preset under Settings → Recording → Maximum camera resolution: 720p, 1080p (default), or 4K. Screen Bolt tries your preferred preset and falls back through 1080p → 720p → high → medium if the device doesn't support it.
- The webcam writes to a separate
webcam.movso it's editable independently of the screen recording. - Toggle Hide camera preview in the recording bar's overflow menu to keep the floating bubble off-screen during recording. The capture still happens — the preview just stops drawing.
Two cameras (Continuity Camera)
Pick a second device under Settings → Recording → Camera 2 and Screen Bolt records both feeds simultaneously into webcam.mov and webcam2.mov. Useful for an iPhone-mounted overhead shot alongside the built-in FaceTime camera.
When the secondary camera is a Continuity Camera (iPhone), Screen Bolt detects the paired microphone automatically — useful when the iPhone has a better mic than the Mac. The pairing uses a 4-character device-name prefix match and excludes built-in MacBook mics.
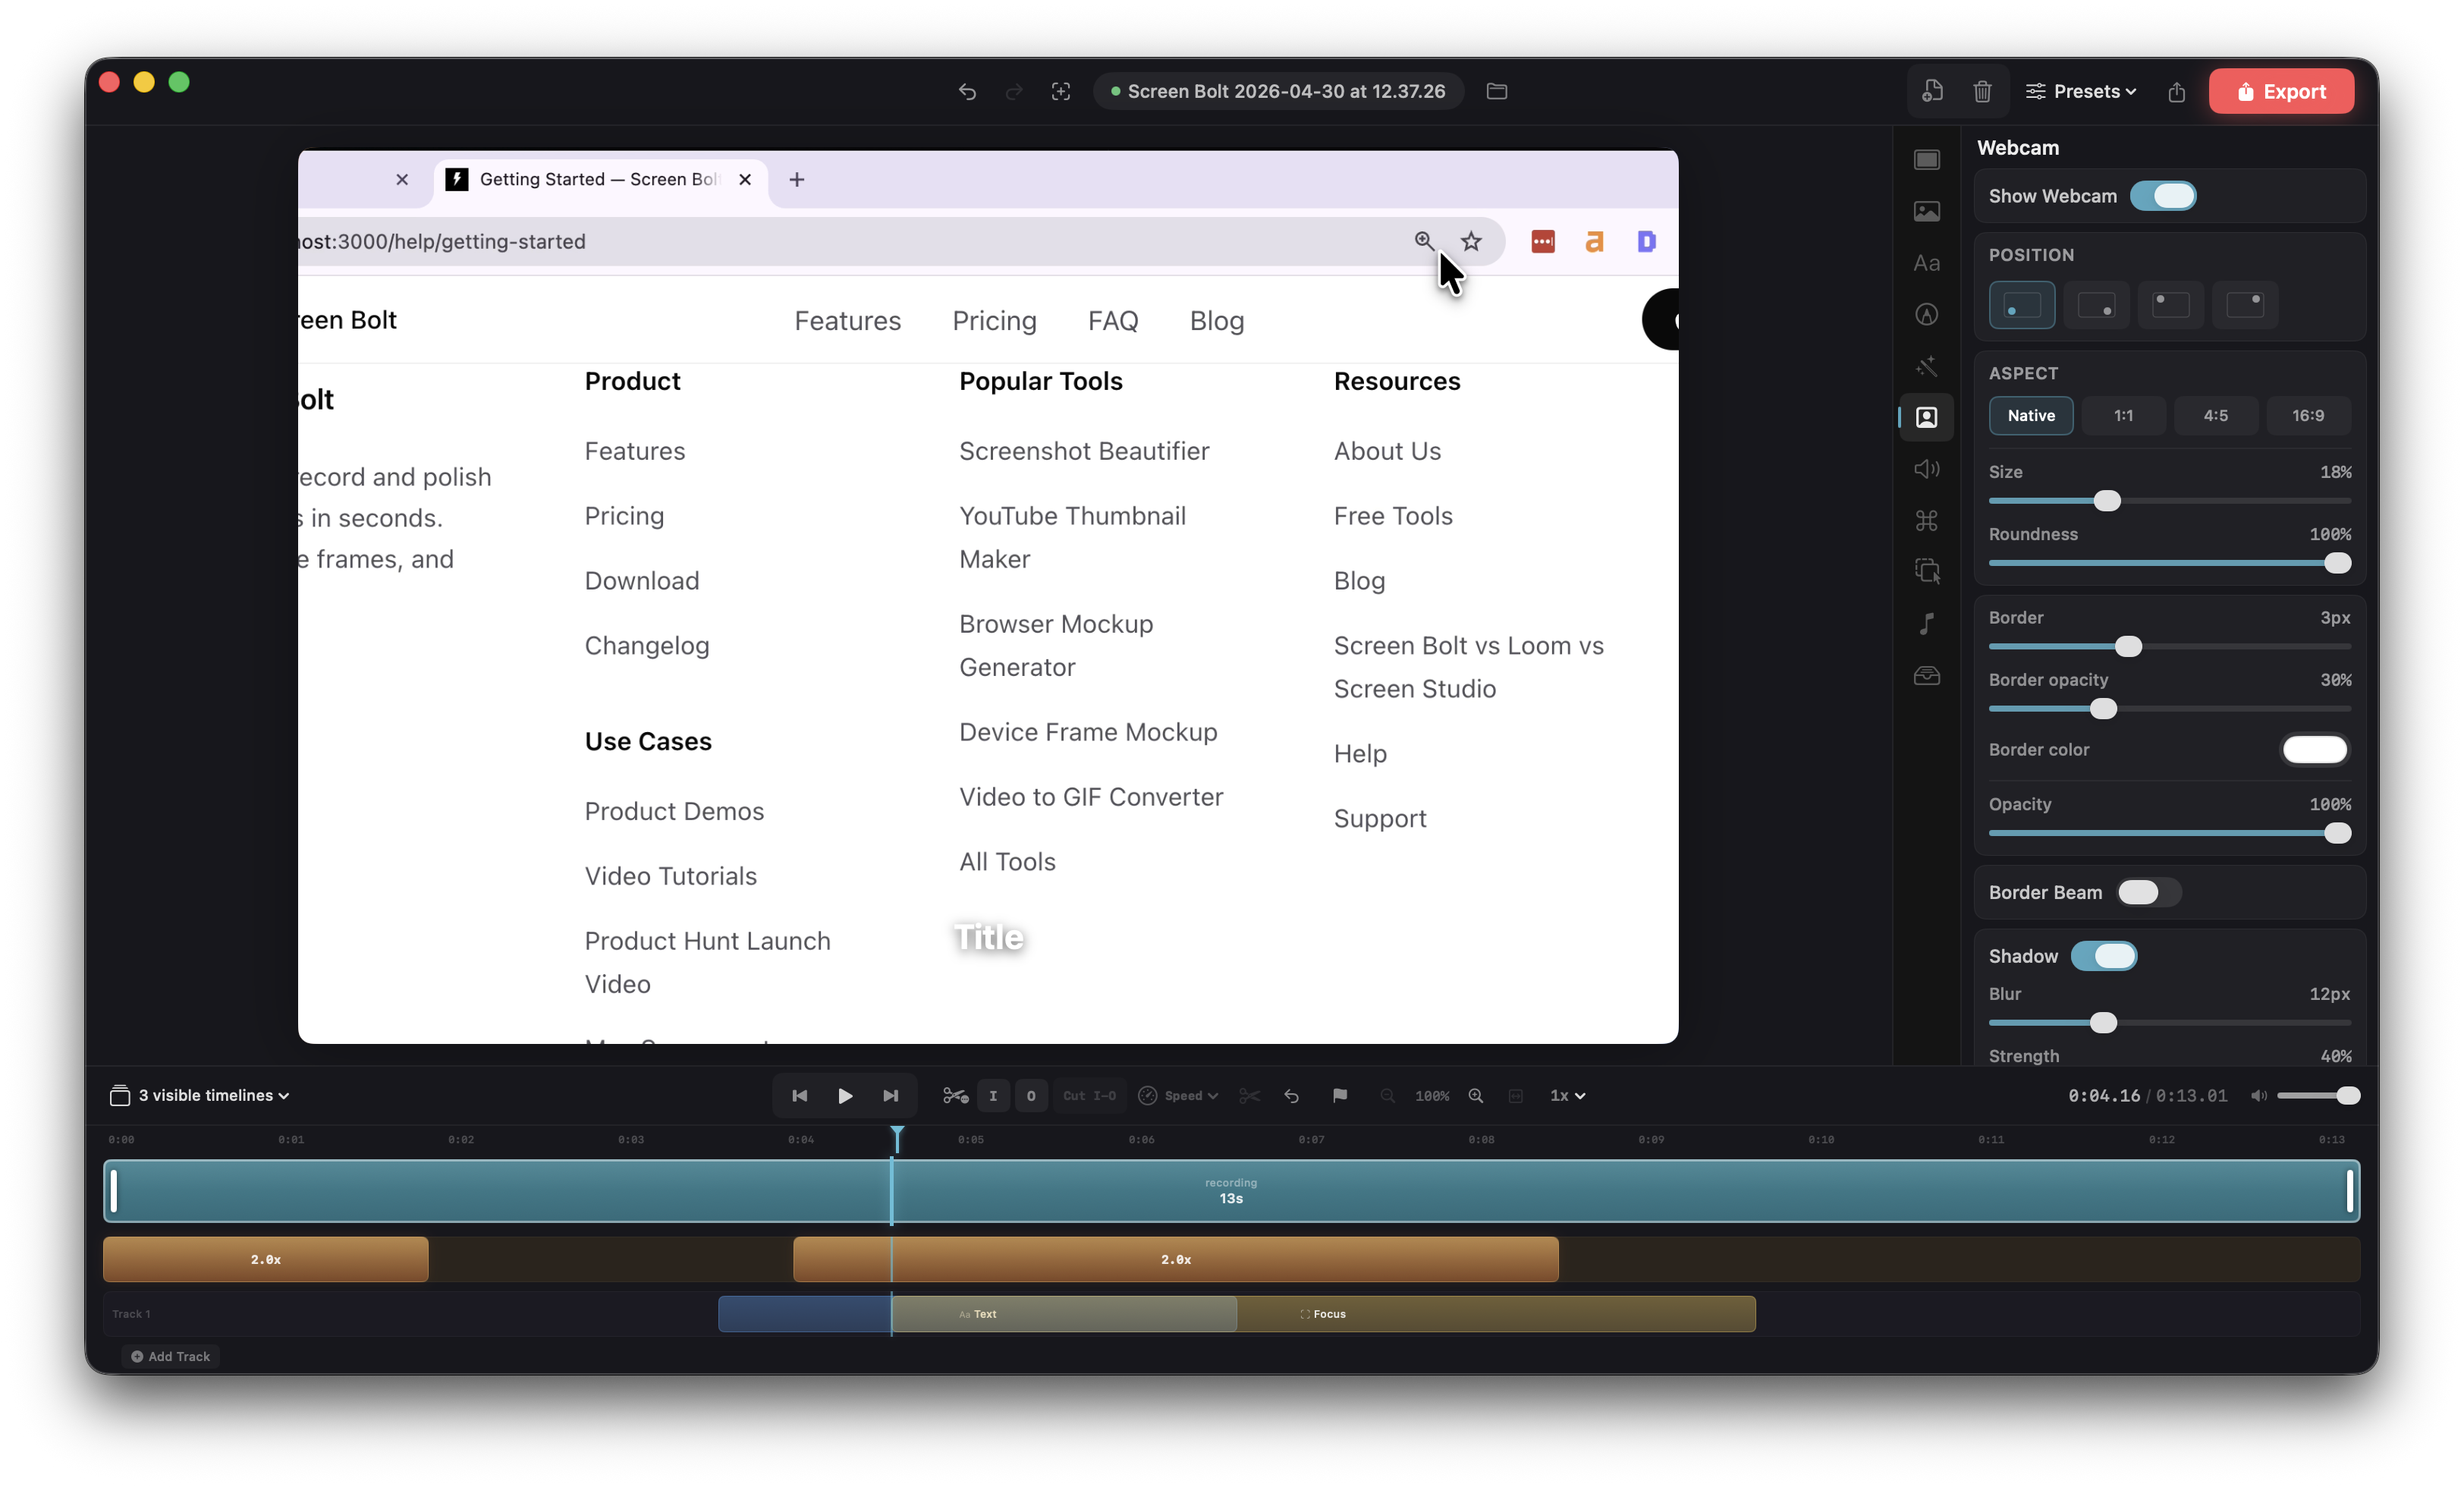
How the webcam is displayed is editor-side — position (four corner presets), size, aspect (Native, 1:1, 4:5, 16:9), roundness (square through perfect circle, default circular), mirroring, border (width, opacity, color, optional animated beam), shadow, opacity, and background removal (swap the webcam background for the screen content behind it). Everything is editable after the fact and applies independently to each camera.
Audio
Two audio sources, both on the recording bar:
- System audio (speaker icon) — everything your Mac is playing, 48 kHz stereo.
- Microphone (mic icon) — your input device.
Both go into the recording as distinct tracks. In the editor you can mute or level them independently, or replace one without touching the other.
A live mic level meter sits above the mic toggle while you're staging a recording, so you can sanity-check your input before hitting record. There's no gain control in the recording bar itself — that's the macOS input device's job. If your mic is hot, fix it in System Settings → Sound → Input and re-record. Waveform visualization and per-track gain live in the editor's Audio panel. If the mic toggle is on before you've granted Microphone permission, Screen Bolt prompts at record time; deny and the recording still runs without voice.
Voice enhancement (editor-side)
When you bring the recording into the editor, three voice-treatment options live under the Audio panel. They run as a one-time analysis pass on the mic track and are non-destructive — toggle them off and the original audio is back.
- Noise reduction. RNNoise machine-learned noise suppression. Great for room hum, fans, and HVAC. Auto-bypassed if macOS Voice Isolation was already active during capture, so you don't double-process.
- Voice clarity. A two-stage DSP chain: a 100 Hz high-pass filter to kill rumble and plosives, plus a +3 dB lift around 3 kHz for speech presence. Light compression on top (≈3:1, soft attack) keeps levels even.
- Loudness normalization. Measures integrated loudness against an ITU BS.1770-4 K-weighted target of −16 LUFS (the broadcast voice standard) and applies a single linear gain. Gain is capped at +9 dB up and −18 dB down so it never destroys the signal.
System audio is processed independently — voice options only touch the mic track.
System audio scope
Under Settings → Recording, System audio mode controls what gets captured:
- All apps (default) — every audio-emitting app on the Mac.
- Selected apps — pick a per-app subset, useful when one specific app is the source and you don't want notification dings or background music sneaking in.
System audio capture uses ScreenCaptureKit and requires macOS 14 or later. There's no extra permission prompt; it's bundled with Screen Recording.
Teleprompter
Press ⇧⌘T or click Script on the recording bar to open the teleprompter — a floating companion window that docks next to the recording bar with your script in it.
- Paste, type, or drag a
.txtfile onto the window to import. It saves automatically as you edit. - Two scroll modes: Auto (continuous, adjustable speed) and Manual (arrows or space advance a page).
- Auto-scroll speed runs from 0.25× to 4×, in 0.25 steps. The reading-time estimate shown at the top scales with it (150 WPM at 1×, 75 WPM at 0.5×, etc.).
- Font size is a preset picker. Pages auto-paginate based on the chosen size: 80 words/page at ≤14 pt, 60 at ≤18 pt, 40 above 18 pt. Splits prefer paragraph breaks, falling back to sentence breaks when a paragraph won't fit.
- Window opacity is a slider from fully transparent to fully opaque, persisted between sessions.
Cue markers
Type any of these inline and they render as a colored chip with an icon. Markers don't print into the recording — they're prompts for you, the talent.
| Marker | Color | Use |
|---|---|---|
[PAUSE] | Orange | Take a beat |
[CUT] | Red | Stop here / cut point |
[B-ROLL] | Blue | B-roll segment |
[SLOW] | Purple | Slow down |
[EMPHASIS] | Green | Hit this beat |
Matching is case-insensitive.
Live mode
Hit record and the teleprompter enters live mode with a 3-second countdown. From there:
- Auto mode: scroll runs continuously.
↑/↓adjust speed by ±0.25 ×,spacepauses and resumes. - Manual mode:
→/←advance and reverse pages,spaceadvances a page. - Pausing the recording (see below) also pauses the teleprompter so the two stay in sync.
The teleprompter window never appears in the recorded output, even when you're capturing the full display — Screen Bolt excludes it from its own capture stream.
Keyboard sounds
In the editor's Sounds panel, toggle Keyboard Sounds to overlay subtle click audio under every key you pressed during the recording. Pick a kit (mechanical, typewriter, soft). Makes demos feel tactile — viewers hear what the presenter's doing.
For this to work, Screen Bolt needs to know when you pressed keys. Capturing those timestamps requires Input Monitoring permission because macOS treats kernel-level key event taps as sensitive — any app observing global keystrokes has to pass through that gate.
Important: Screen Bolt only records the class of each key (normal, space, enter, backspace, modifier) and its timestamp. The keycode itself is never stored. You get the rhythm without anything revealing what you typed — project files are safe to share. If Input Monitoring is denied, every other feature works; keyboard sounds just have nothing to play against.
Cursor tracking
Cursor position, clicks, and cursor-shape changes are captured for the full recording, independent of any toggle. They get used two ways in the editor:
- Auto zoom — Screen Bolt clusters your clicks into zoom regions so viewers see the UI at a readable size without keyframing. Toggle it off in Settings → Recording → Create zooms automatically (or Record → Automatically create zooms) if you'd rather add zooms manually.
- Cursor effects — in the editor's Cursor panel, stylize the cursor (larger, colored, click ripples), hide it during idle stretches, or override it. Because Screen Bolt captures cursor events directly instead of filming the native cursor, the stylized cursor stays crisp at any zoom level.
What's recorded:
- Position at 120 Hz, with sub-pixel culling — moves under 0.5 px within 10 ms of the last sample are dropped, so file size stays small without losing motion.
- Left and right clicks, time-stamped to the millisecond.
- Cursor shape — Screen Bolt detects 17 system cursor types (arrow, I-beam, pointing hand, open/closed hand, crosshair, resize handles, contextual menu, drag-copy/link, zoom in/out, and so on) by fingerprinting the cursor image, throttled to ~10 samples per second so it doesn't burn CPU.
Cursor coordinates are localized to whichever capture source you picked — display, window, or area — so the editor's auto zoom can aim correctly even when the window moved during recording.
Recording controls
- Start / stop —
⌃⌘↵from anywhere, or click the red circle / stop square on the recording bar. - Mode + start in one shot —
⌘⌥3/⌘⌥4/⌘⌥5picks the mode and starts. For Window and Area, the picker appears first. - Pause / resume — pause from the recording bar mid-capture and the timer freezes. Resume and the recording continues seamlessly — Screen Bolt absorbs the gap so the timeline stays continuous and the teleprompter pauses with it.
- After-recording behavior — under the Record menu, pick Create project (opens the editor) or Export and save to file (skips the editor, renders straight to disk with your default Quick Export settings — see Exporting).
Pre-flight checks
Before each recording, Screen Bolt does two safety checks:
- Disk space. If the drive hosting
~/Screen Bolt Projects/has less than 60 minutes' worth of headroom at the estimated bitrate, Screen Bolt warns you. A live monitor runs every 30 seconds and alerts again if free space drops below 2 minutes' worth mid-recording. - Frame drops. Per-track drop counters track video, system audio, and mic streams. After recording, the editor surfaces drop counts in the corner if anything was lost so you know whether to re-record.
While recording, the bar collapses to a capsule with a timer and a stop button. The native cursor is not baked into the video — Screen Bolt captures without it and renders its own stylized cursor in the editor. That's what keeps cursor effects and zoom clean.
Tips by use case
Short tutorials. Window mode, mic on, system audio off unless the app makes relevant sound. Let auto zoom do its work on each click. Trim dead air in the editor.
Product demos. Display mode at full retina, webcam in a corner, mic on. Write your script in the teleprompter, turn on keyboard sounds so typing feels intentional, auto zoom on.
Bug repros. Area mode around the broken UI, mic off, system audio on. Don't narrate — just demonstrate. Export straight to file from the Record menu and drop it in the ticket.
Async status updates. Display mode, webcam bottom-left at 20–25%, mic on. Short, unscripted. Free-tier watermark is fine for internal Slack.
Design walkthroughs. Window mode on Figma, mic on, webcam off. Manual teleprompter if you're following an outline; auto zoom off if you want the whole composition visible throughout.