Editing Your Recording
Timeline basics, cuts, zoom regions, speed ramps, and cursor effects.
When a recording finishes, Screen Bolt drops you into the editor with your clip already loaded, auto zoom regions already generated, and your cursor data already applied. Most recordings are export-ready the moment the editor opens. The rest of this page covers the tools you reach for when "most" isn't good enough — trimming dead air, tightening a speed ramp, re-aiming a zoom that landed on the wrong spot.
Editor layout
The editor is four surfaces that all speak to each other:
- Preview sits at the top. It's the final composition — background, screen, webcam, overlays — rendered live at whatever point the playhead is at. Skim, scrub, or play; everything redraws in real time.
- Timeline runs along the bottom. One track per kind of content: the clip track, the zoom track, the camera track, the webcam fullscreen track, overlay tracks for text/images/blur/focus/annotations, and an audio track. You can hide any of them from the stack icon on the left side of the transport bar.
- Left sidebar holds panel-specific controls. Switch panels from the icons on the rail, or with
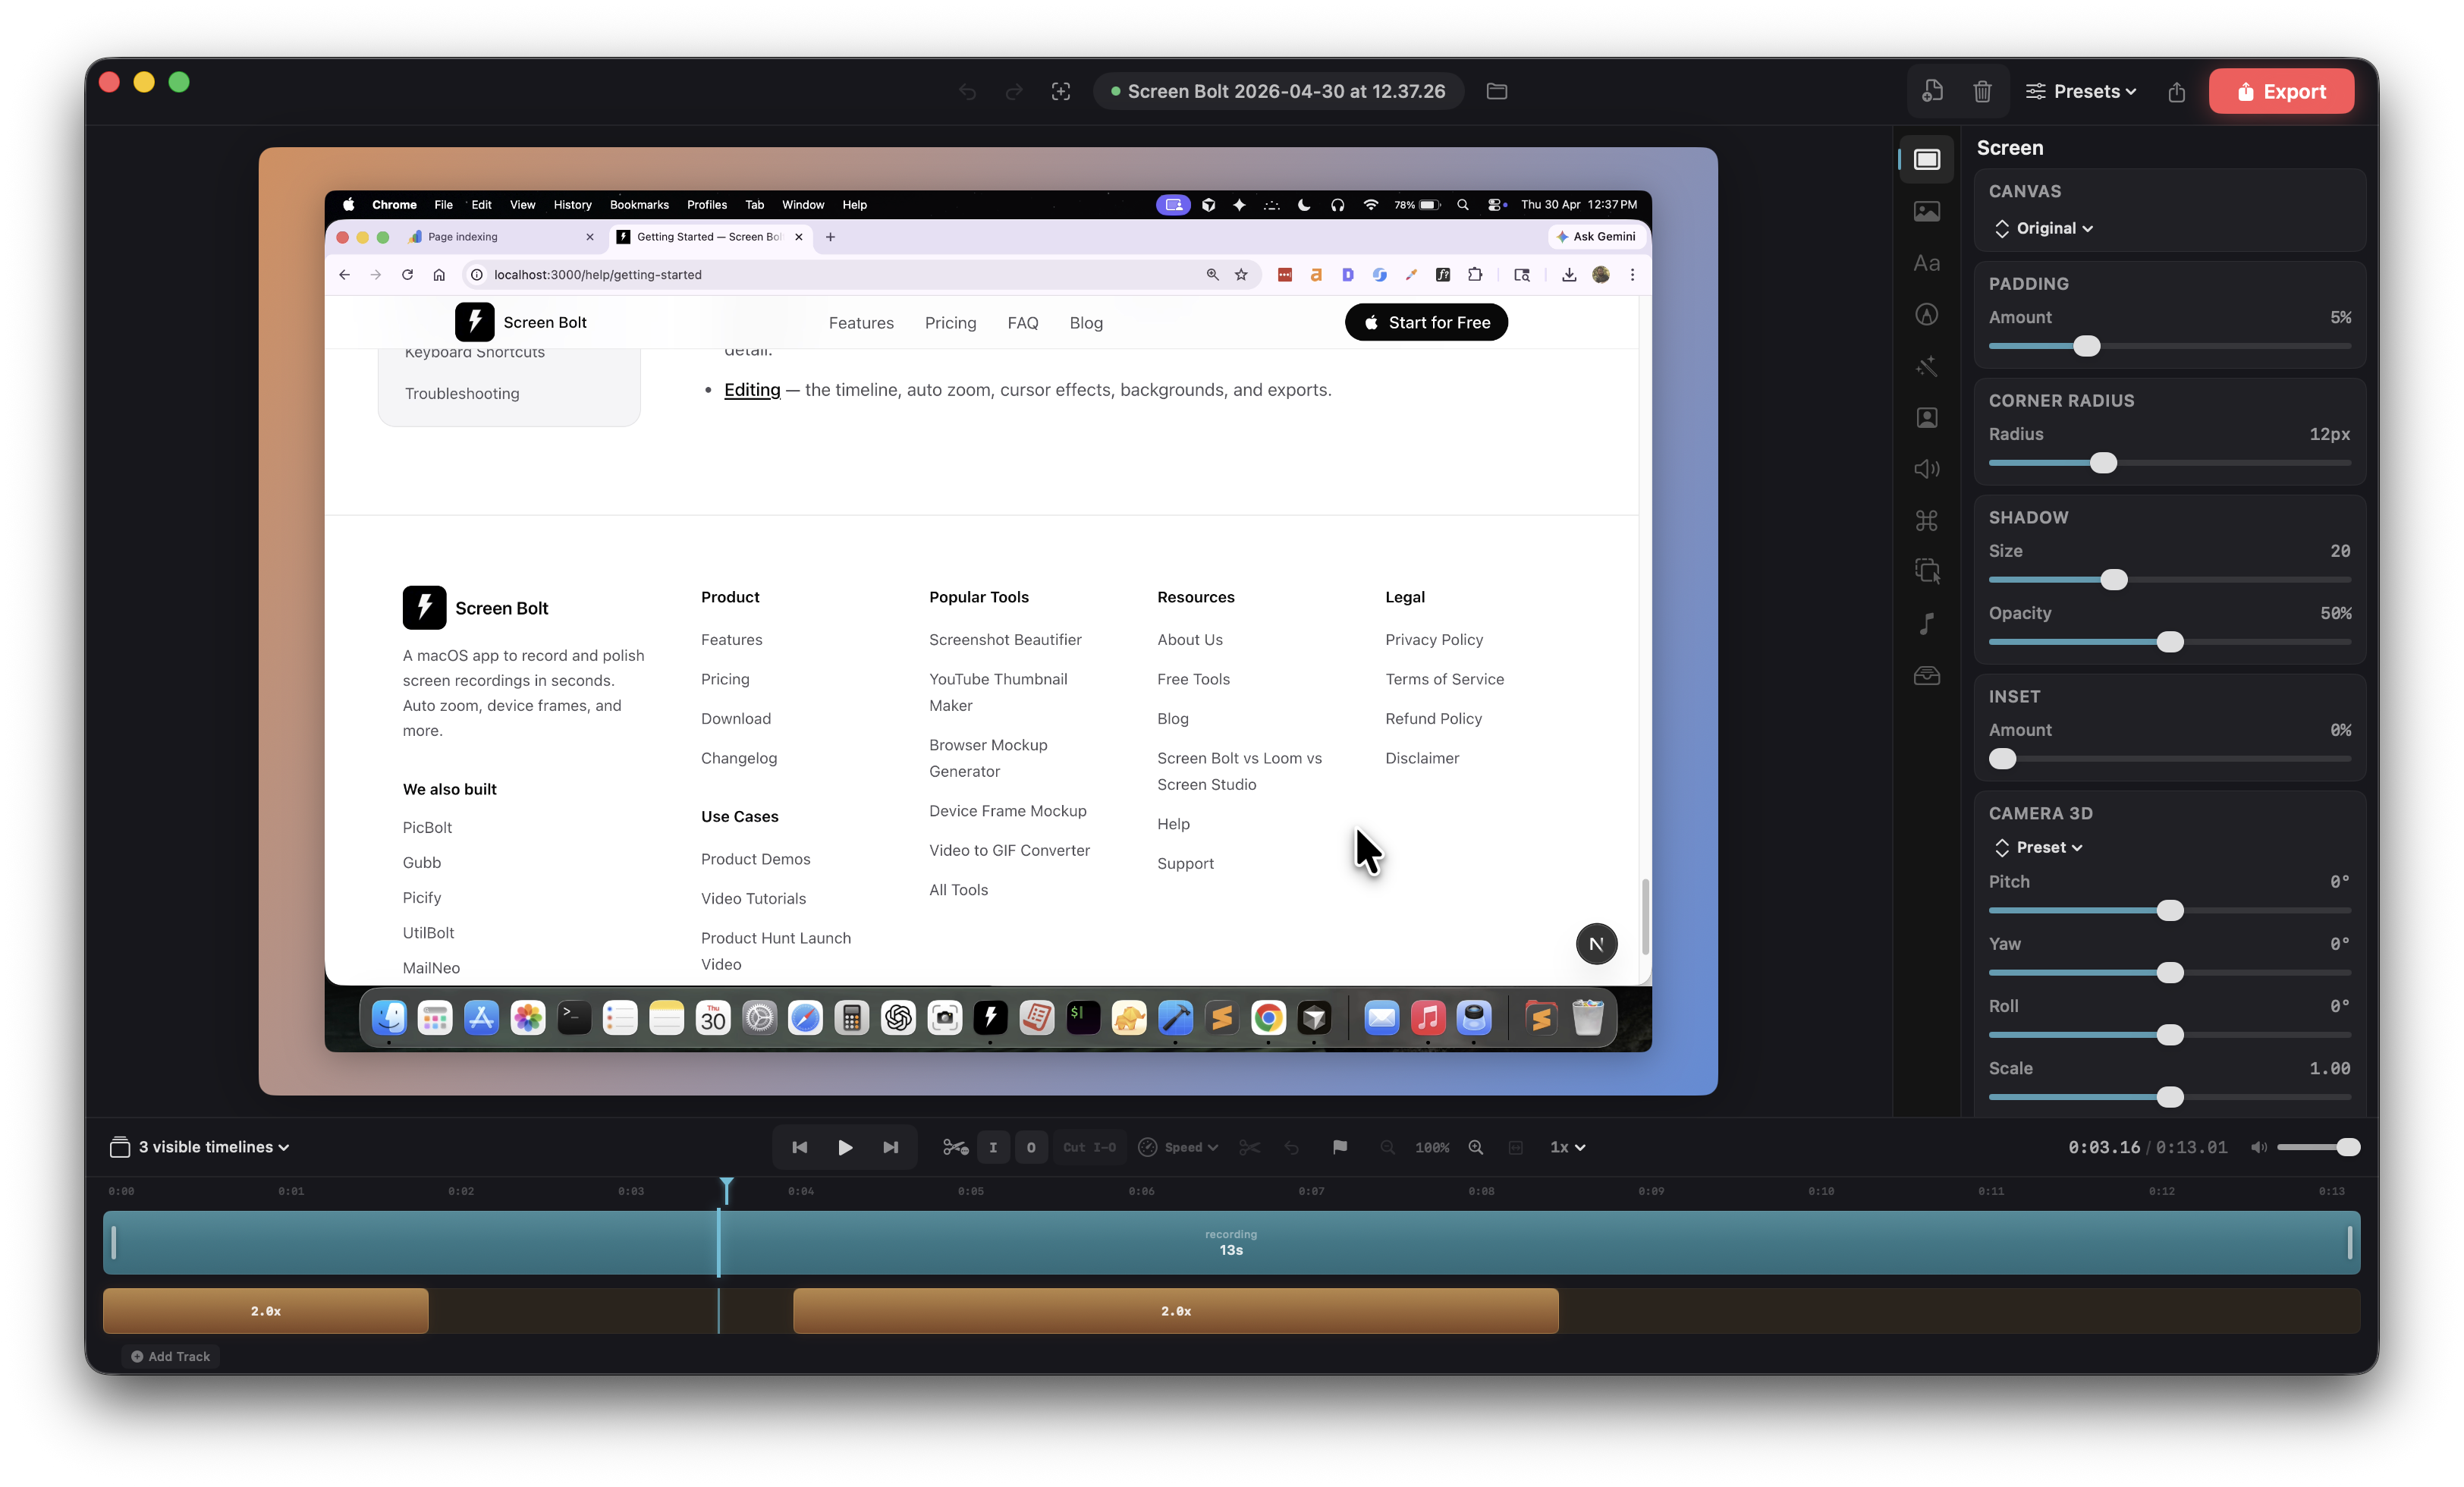
<kbd>⌘1</kbd>–<kbd>⌘6</kbd>(more on those below). - Toolbar across the top covers the global stuff: undo/redo, project name, preset picker, aspect ratio, and export. The preset picker has five built-ins — Default, Presentation, Social Media, Clean, and Device Showcase — plus any custom presets you've saved.
Playback
The transport bar sits above the timeline tracks. <kbd>Space</kbd> toggles play/pause. The jump-to-start and jump-to-end buttons flank the play button — keyboard equivalents are <kbd>fn</kbd> <kbd>←</kbd> and <kbd>fn</kbd> <kbd>→</kbd>, or <kbd>Home</kbd> / <kbd>End</kbd> on a full-size layout. Frame-by-frame stepping is <kbd>←</kbd> and <kbd>→</kbd>; hold <kbd>Shift</kbd> to jump five seconds at a time.
Hover the time ruler to skim — the preview follows your cursor without actually moving the playhead. Click the ruler to scrub; drag to scrub continuously. For JKL-style scrubbing: <kbd>J</kbd> slows by a quarter, <kbd>K</kbd> pauses, <kbd>L</kbd> speeds up by a quarter. Turn on Loop playback from the View menu if you're iterating on a specific section.
Timeline basics
The timeline shows every track stacked vertically, with the playhead as a vertical line across all of them. Time flows left to right. The ruler at the top shows seconds and minutes; tick density adapts to duration and zoom — half-second ticks under 5 s, 1 s ticks up to 30 s, 5 s ticks up to 2 min, and 10 s ticks beyond.
Zooming the timeline. Use the magnifying-glass buttons in the transport bar, or <kbd>⌘=</kbd> to zoom in, <kbd>⌘−</kbd> to zoom out, and <kbd>⌘0</kbd> to fit everything back into the viewport. You can also hold <kbd>⌘</kbd> and scroll anywhere in the timeline to zoom smoothly. Range is 100% (fit) to 400%, in 0.25 steps from the buttons.
Snap. When you drag In/Out markers, overlay clips, or region handles, they snap to the playhead and to existing timeline markers within 6 pixels of screen tolerance. No toggle — it's always on, and the tolerance is small enough that you can still land anywhere you want. A cyan vertical guide flashes when a snap target is hit.
Markers. Press <kbd>M</kbd> to drop a yellow marker at the playhead. <kbd>[</kbd> and <kbd>]</kbd> jump between markers. Useful for bookmarking sections of a long recording before you start cutting.
Skim vs. scrub. Hover the time ruler and the preview follows your cursor without moving the playhead — that's skim. Click or click-drag the ruler to actually scrub the playhead. JKL works as in any pro editor: <kbd>J</kbd> slows playback by 0.25× (down to 0.25×), <kbd>K</kbd> pauses, <kbd>L</kbd> speeds up by 0.25× (up to 4×). If playback isn't running, J or L start it.
Cutting and trimming
Two styles, pick whichever matches how your brain works.
Mark In / Out
Press <kbd>I</kbd> to set an In point at the playhead and <kbd>O</kbd> for an Out point. The region between them highlights in the timeline. Click Cut I-O (or press <kbd>Delete</kbd> with both marks set) and that region disappears — the clip stitches back together and the playhead ends up where the cut was.
The In and Out markers are draggable. If you set them approximately and want to nudge, grab the handle and slide it along the ruler; it'll snap to the playhead if you pass over it.
Split at playhead
Press <kbd>S</kbd> to split the clip at the current playhead. The scissors icon in the transport bar does the same thing. Split is the starting move for a lot of edits — split, select the resulting segment, delete it.
Cut regions
Cuts are represented as regions, not destructive edits. The source video isn't touched. You can clear every cut at once with the trash icon in the transport bar, which is useful if you over-edited and want to start from the original timing.
Speed
Global speed lives in the transport bar — the menu to the right of the zoom controls. Pick from 0.25×, 0.5×, 0.75×, 1×, 1.25×, 1.5×, 2×, 3×, or 4× and the whole project plays back at that rate. This affects both the preview and the final export.
Speed ramps
Speed ramps are range-scoped speed changes. Set an In and Out around the section you want to retime, then open the speed menu — the bottom half shows Ramp to 0.25×, Ramp to 0.5×, Ramp to 0.75×, Ramp to 1.5×, Ramp to 2×, Ramp to 3×, and Ramp to 4×. A speed segment gets added for that range with ease-in and ease-out enabled by default, so the ramp isn't a jarring jump. Layer multiple ramps across a single recording for slow-mo on the complex part and 2× on the filler.
The 1.25× option lives only in the global menu, not in the ramp menu — speed ramps step in quarter-and-half increments to keep the menu short.
Multiple clips
The timeline supports multi-clip compositions. When you bring in more than one video — either by importing additional recordings into the media library or by pulling an existing project into a new one — the clips line up end-to-end in the clip track and play back as a single continuous video. Cuts, zooms, overlays, and speed segments all work across clip boundaries.
Zoom regions
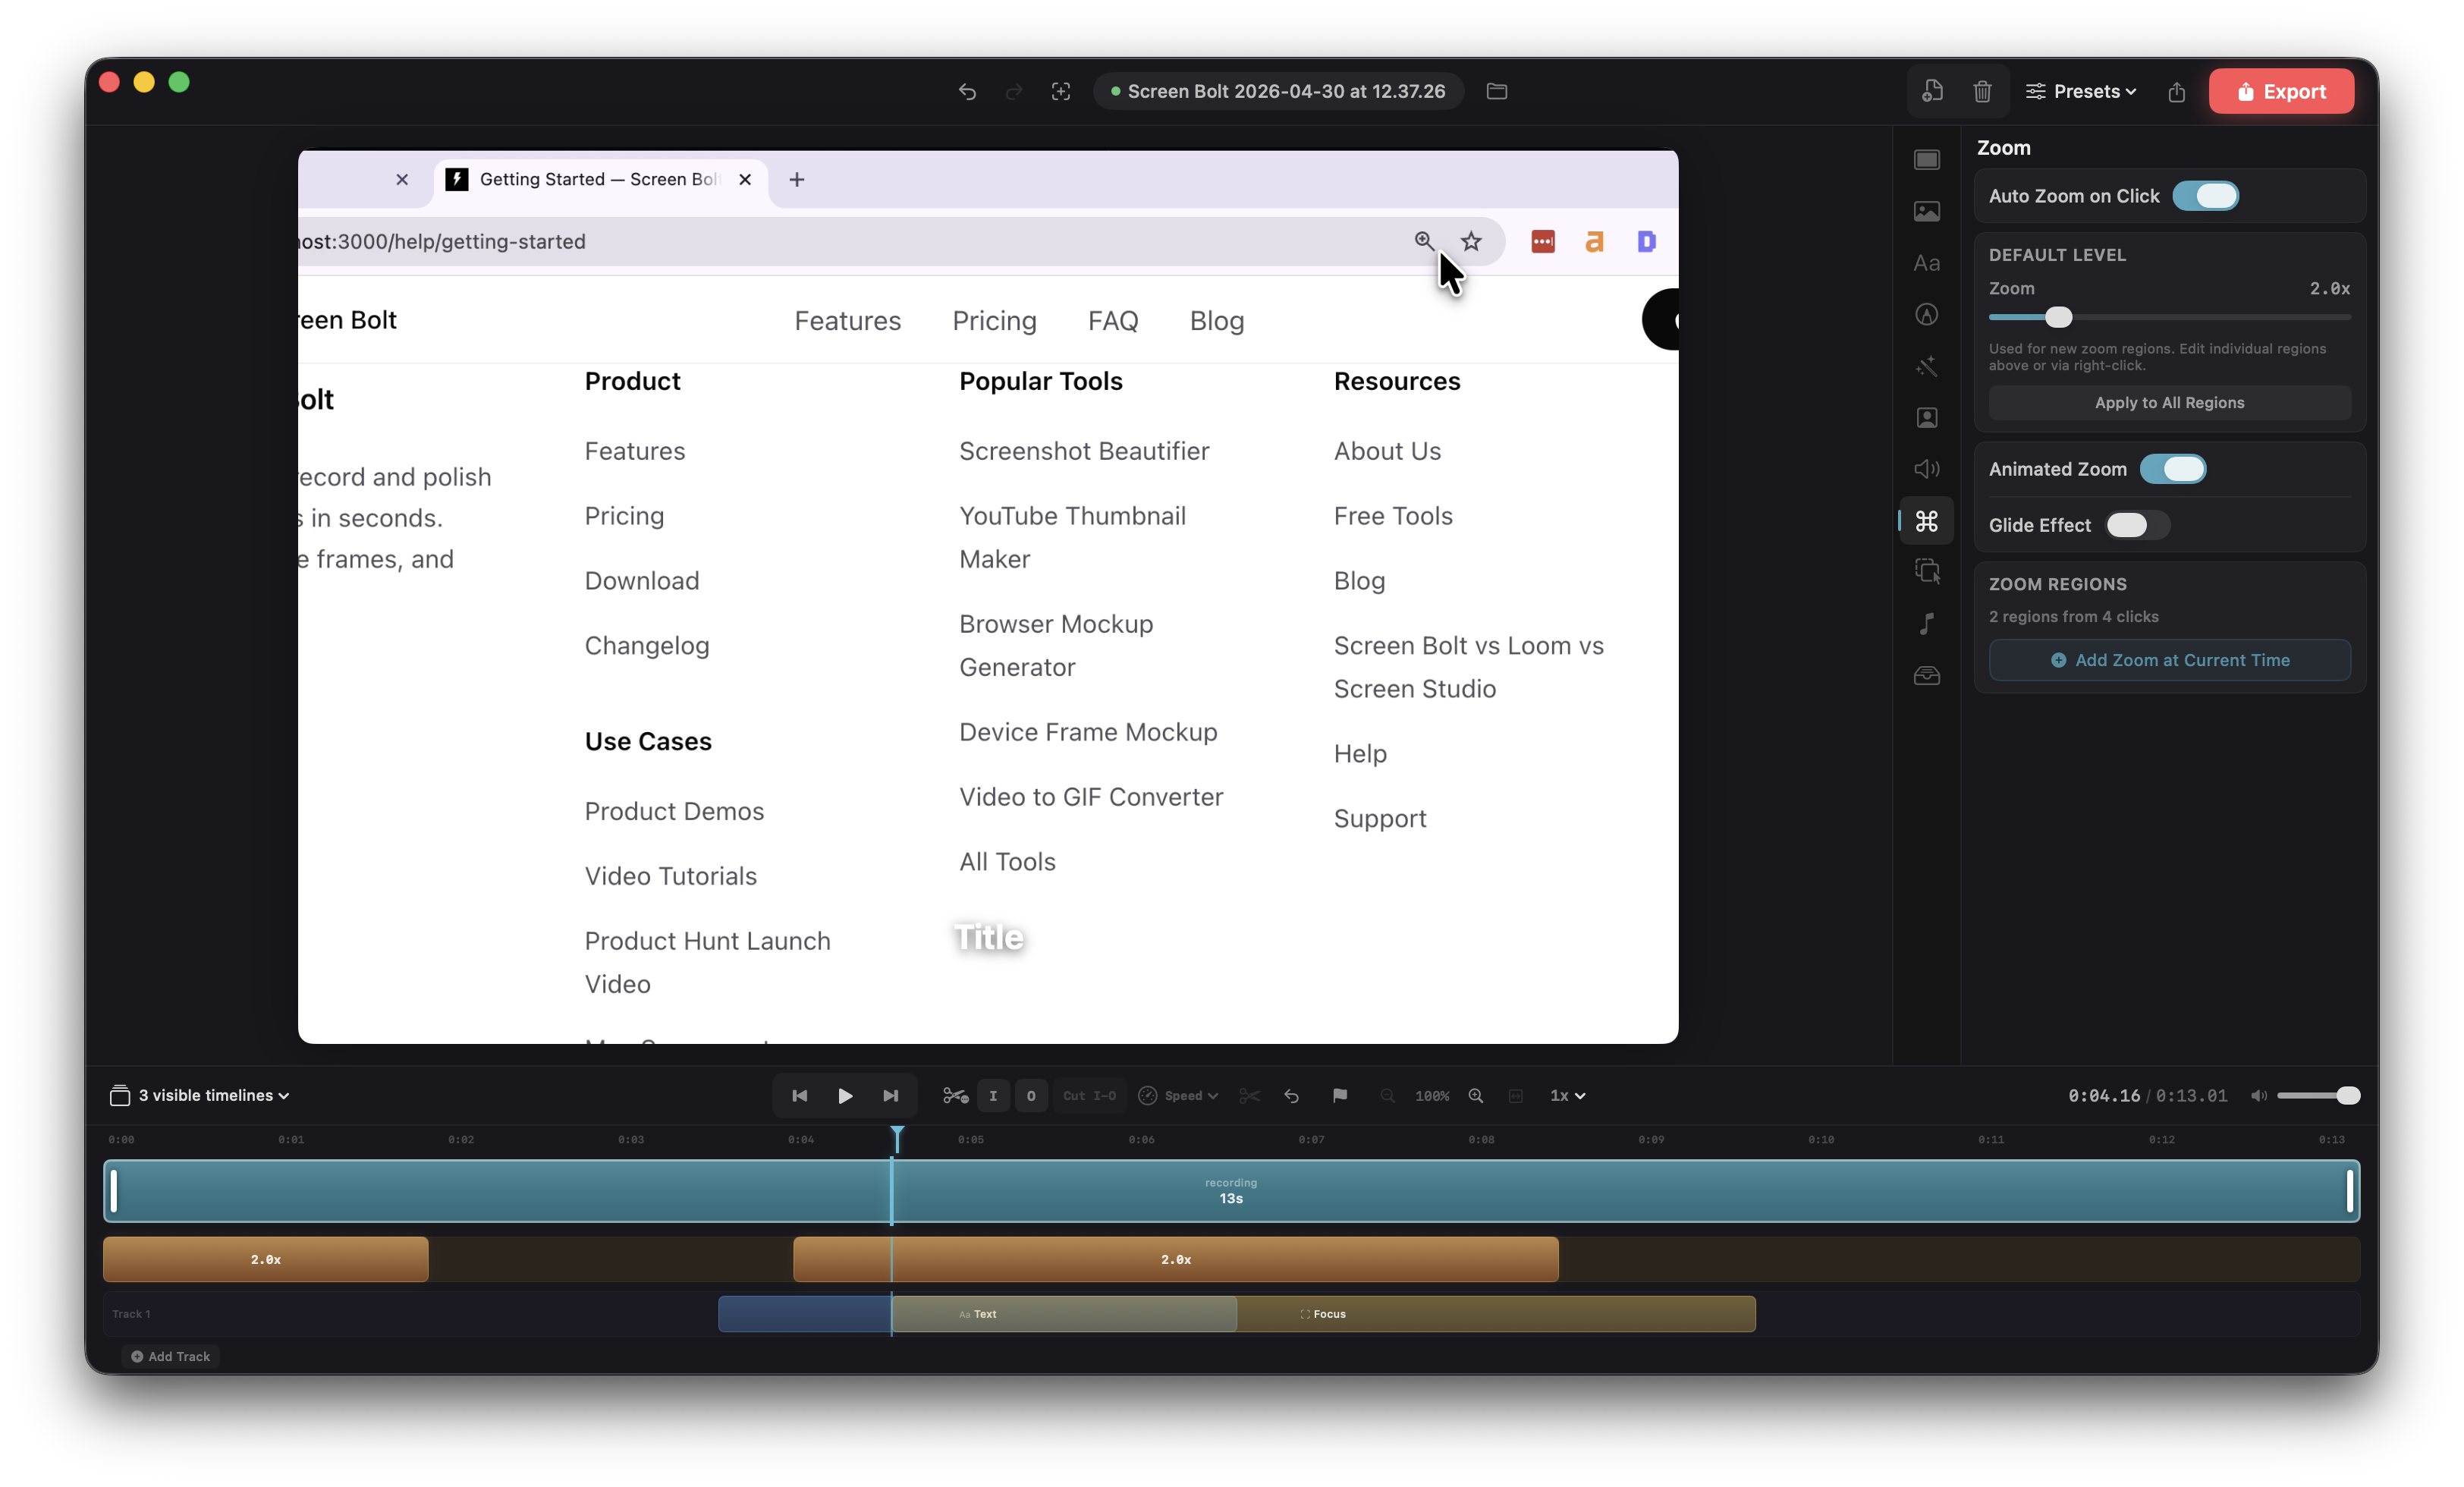
Auto zoom detects your clicks and generates zoom regions automatically. Each region sits on the Zoom track — a small horizontal bar with ease-in, hold, and ease-out segments. You can hide the zoom track from the stack-icon menu if you don't want to see it.
How auto zoom decides where to land
Screen Bolt clusters clicks before generating regions, so a flurry of clicks in one corner becomes a single zoom rather than a chain of pop-ins.
- Clicks within 1 second and 200 px of each other merge into one cluster.
- Pure drag motions (mouse-down + ≥10 px movement within 150 ms) are filtered out so dragging a slider doesn't kick off a zoom.
- Each cluster gets a zoom region with a 0.6 s minimum hold (extended by the cluster's own duration plus 0.3 s), and 0.8 s ease-in / ease-out using a smootherstep curve so the camera doesn't snap.
- Overlapping regions are merged automatically — Screen Bolt extends the previous hold rather than stacking two zooms.
Editing a zoom region
- Add at the playhead with
<kbd>⌘K</kbd>. New regions span 0.5 s before the playhead to 2 s after, aimed at the last-known cursor position. - Move by dragging the body of the bar.
- Resize by dragging either end. Ease durations re-scale to about 15% of the new span (capped at 0.3 s each side). Minimum region length is 0.4 s.
- Adjust scale and center. Select a region to open its controls in the Zoom panel (
<kbd>⌘5</kbd>). The per-region zoom slider goes from 1.1× to 6×; drag the center dot inside the preview to aim it. - Delete a selected region with
<kbd>Delete</kbd>, or clear every auto-generated zoom from the panel if you'd rather hand-place them.
Panel options
- Auto zoom — whether new recordings get the click-driven zooms (default on).
- Default level — the level new manual regions start at, 1.2× to 6×, default 2×. The Apply to All Regions button propagates the new default to every existing region.
- Animated zoom — adds spring physics to the zoom motion instead of a pure ease.
- Glide — a subtle drift between regions so the camera feels hand-held rather than stepped. Glide speed runs 0.1 to 1.0; higher values catch up faster, lower values feel slower and softer (default 0.5).
- Dynamic dead zone — while the camera holds a zoom, it follows the cursor only when the cursor moves out of a velocity-adaptive dead zone (35% of the viewport at low velocity, narrowing to 10% at high velocity). Keeps the camera still when the cursor is hovering and follows when there's intent.
The Zoom Regions card in the panel always shows the current count plus the click count, so you can sanity-check how aggressive auto zoom got before exporting.
Cursor settings
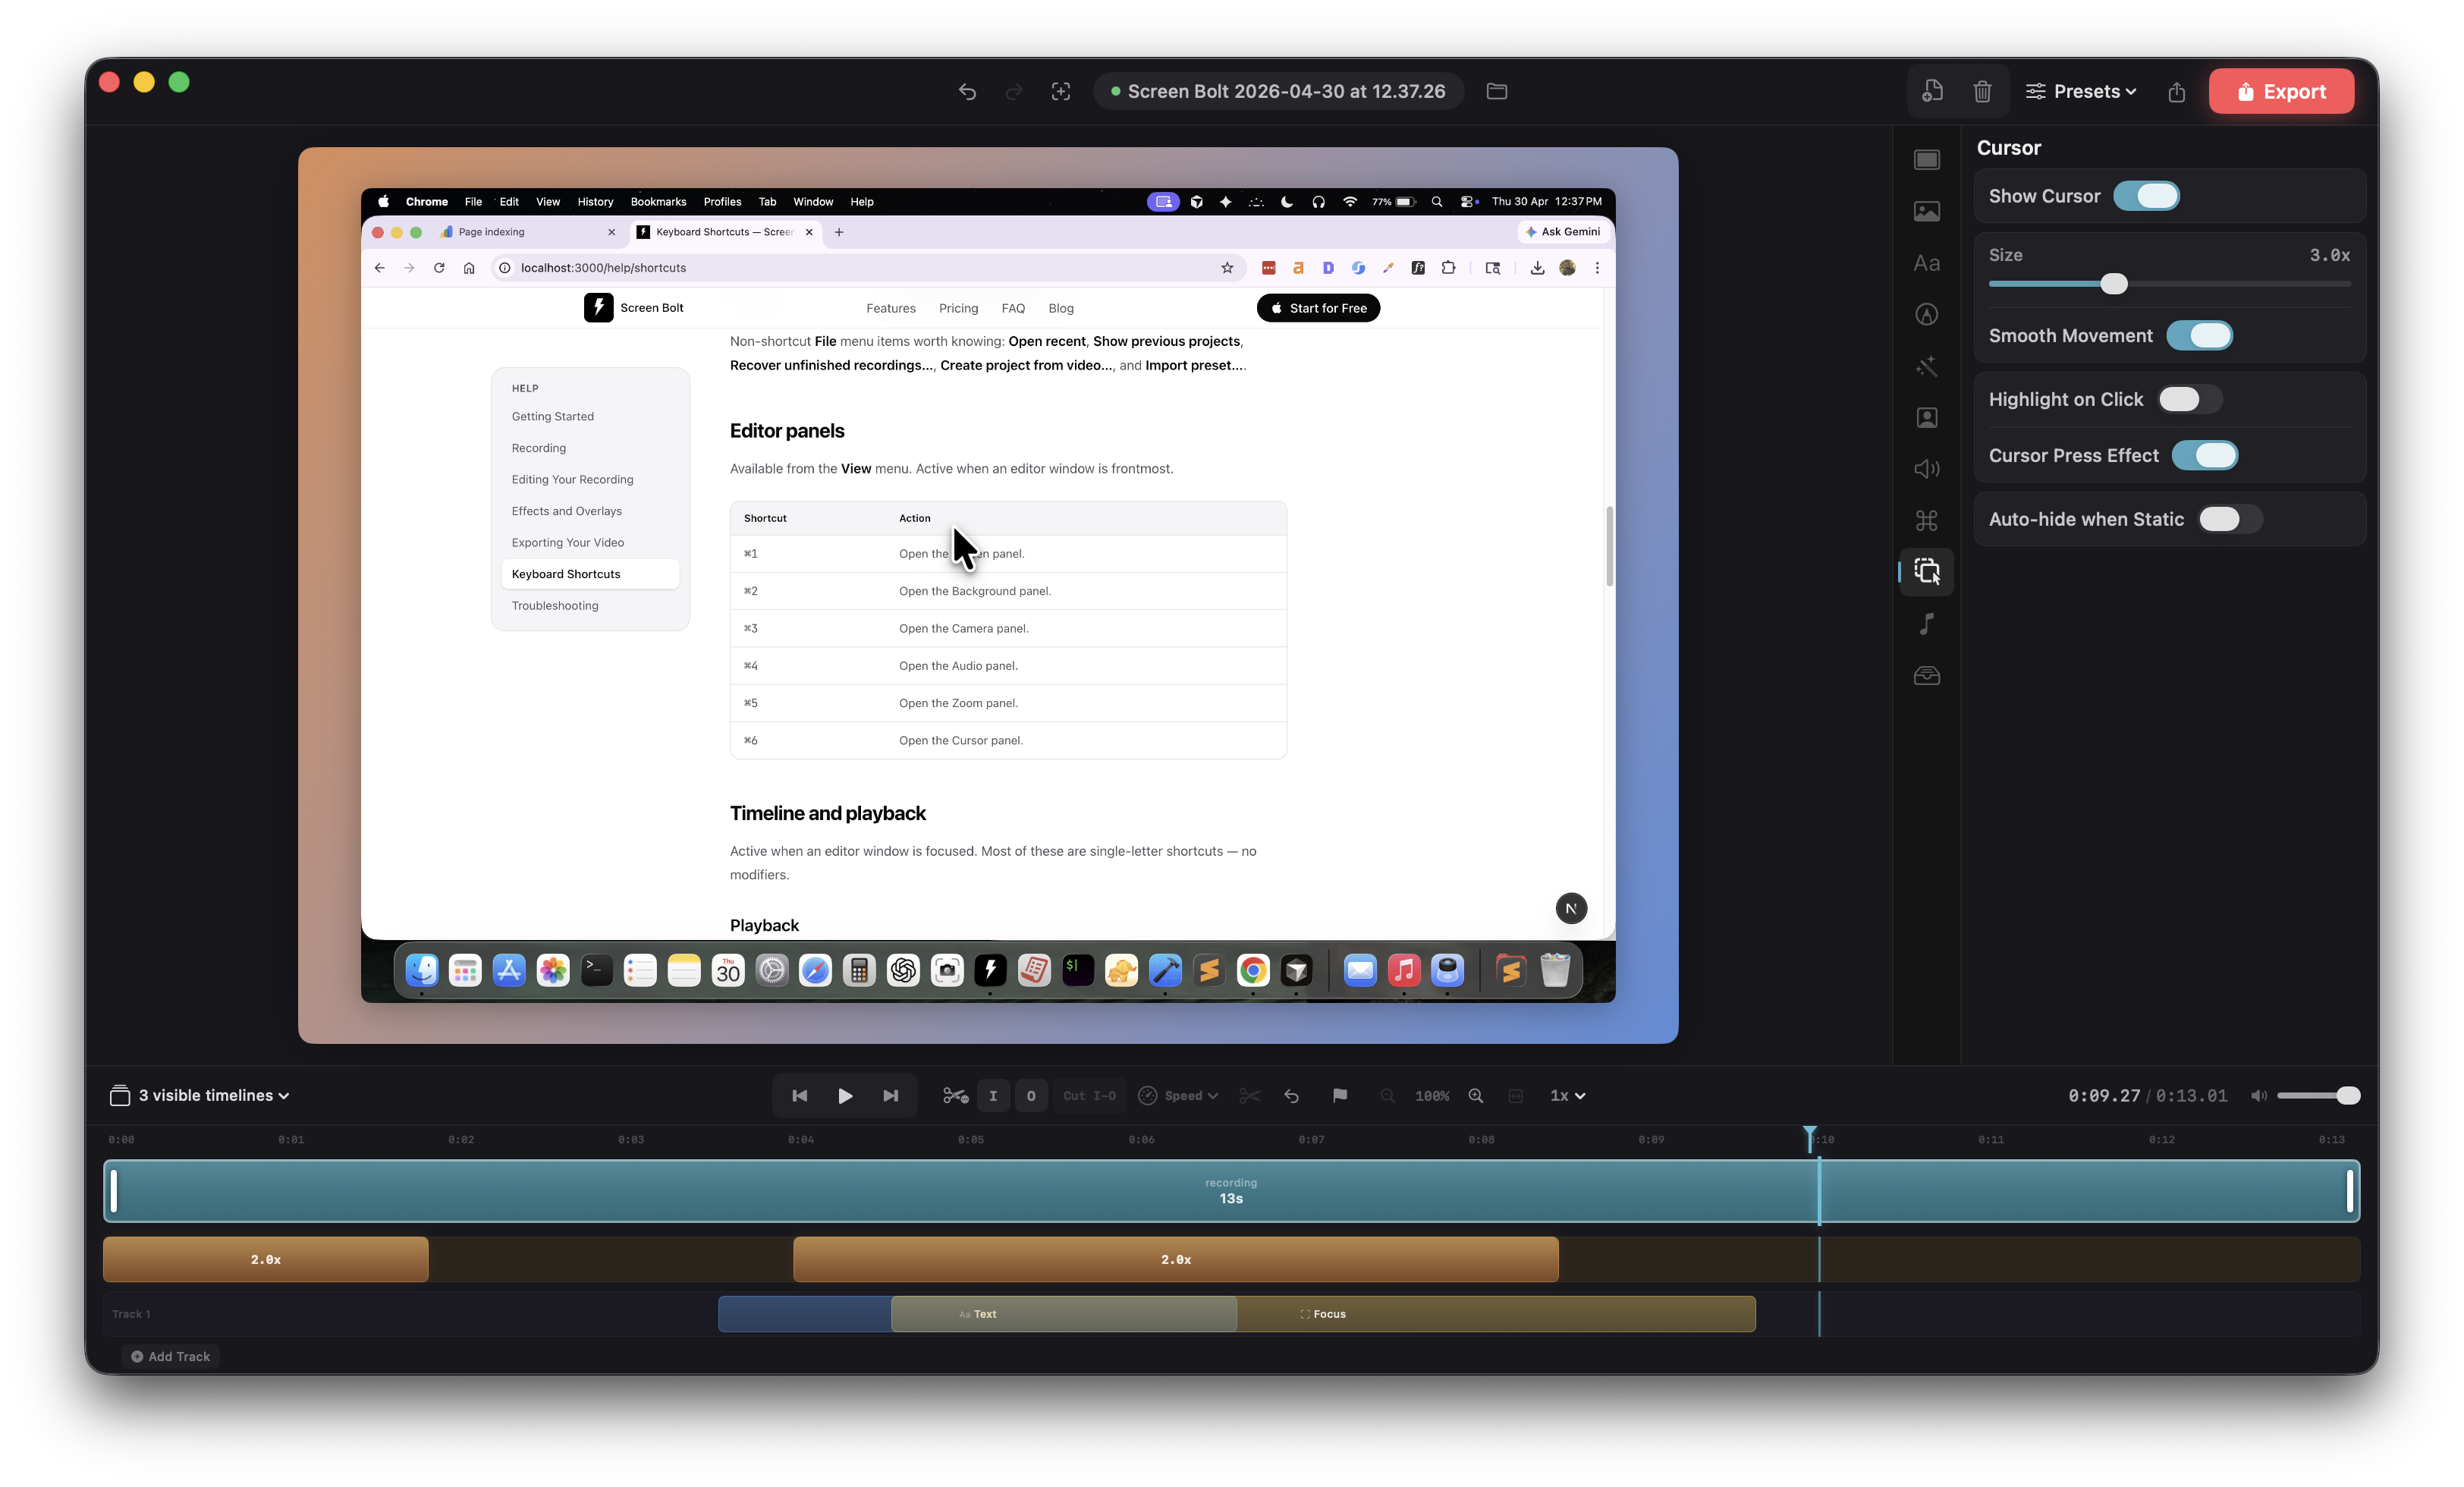
The Cursor panel (<kbd>⌘6</kbd>) wraps everything the recorded cursor does on playback. Because the cursor is rendered, not filmed, every option below stays crisp at any zoom level.
- Show cursor. Master toggle. Off and the cursor is invisible everywhere; useful for talking-head segments over a static screen.
- Size. 1× to 5×, default 3×. Screen Bolt re-renders the system cursor at the requested size, so there's no pixel upscaling.
- Smoothing. On by default. Hermite-interpolates the recorded cursor path so it reads as intentional instead of twitchy.
- Click highlight. An optional ring that pulses on each click — 0.4 s animation. The color picker in the panel sets the ring color (default a warm yellow).
- Press effect. A subtle squish on press (scale to 0.85 over 0.12 s) and spring back on release (over 0.22 s). Makes clicks feel physical.
- Auto-hide. Fades the cursor out after 1.5 seconds of stillness, with a 0.25 s fade. Movement or a click brings it back instantly. Handy for sections where you're narrating over a static screen.
The cursor that gets drawn always reflects the real shape Screen Bolt observed during recording — arrow when you're hovering, I-beam over text fields, resize handles when grabbing window edges, and so on.
Webcam in the editor
If you recorded with the webcam, it shows up as a floating bubble and gets its own timeline track. Both the primary camera and (if you used it) the secondary Continuity Camera have full independent control sets.
- Position presets. Bottom-left (default), bottom-right, top-left, top-right — pick in the Camera panel (
<kbd>⌘3</kbd>). - Size. Slider in the panel; default 18% of canvas width.
- Aspect. Native, 1:1 (square), 4:5 (portrait), or 16:9 (landscape).
- Roundness. 0 is a square, 1 is a circle (default), anything in between is a squircle.
- Mirror. Flips the feed horizontally — useful so on-screen text reads correctly when you're showing it to camera.
- Border. Width, opacity (default 30%), and color. The optional Border beam adds an animated highlight that travels around the border with adjustable speed and color — good for drawing attention without being shouty.
- Shadow. Toggle plus radius (default 12), opacity (default 40%), and Y-offset (default 4) sliders.
- Opacity. Per-camera, 0 to 100%.
- Background removal. Segments the webcam feed live in the preview — no green screen needed.
If you recorded with two cameras, the Camera panel has a slot picker at the top. Each slot keeps its own position, size, border, shadow, and fullscreen-region list.
Webcam fullscreen regions
For moments where the webcam should take over the whole frame — an intro, a reaction, a sign-off — mark a range with In/Out, then add a webcam fullscreen region from the Camera panel. The region expands the webcam to fill the canvas with a smootherstep ease-in (default 0.5 s), holds, and eases back down to the PiP bubble. Multiple regions in one project are fine; they show up as purple bars on the webcam track and are draggable and resizable like zoom regions. Easing durations cap at half the region span so a short region still completes its in/out cleanly.
3D camera moves
The Camera panel also drives a project-level camera transform — an extra 3D framing layer on top of your composition. Useful for cinematic intros, ad-style hero shots, or just adding subtle motion to an otherwise static segment.
The global transform applies to the whole project. Camera regions override it for ranges you mark with In/Out, the same way speed ramps work. Each region animates from the surrounding transform into its own using one of five easing curves (linear, ease in, ease out, ease in-out, smootherstep) over an auto-calculated ramp — 15% of the region span, clamped between 0.15 s and 0.6 s. Minimum region length is 0.4 s.
Five built-in transform presets are one click away: Straight (the identity, no transform), Cinematic, Isometric, Dutch, and Showcase. Use them as starting points and tweak the rotation and translation values to taste.
Toggle Show camera gizmo in the panel to surface an interactive joystick on the preview for direct manipulation.
Undo and redo
Every cut, zoom, speed change, overlay move, or panel adjustment is undoable. <kbd>⌘Z</kbd> reverses the last action, <kbd>⌘⇧Z</kbd> redoes. The undo stack holds the last 50 changes. The toolbar has visible undo/redo buttons too.
Autosave
Screen Bolt autosaves every 30 seconds while the editor is open, so a crash or power loss won't drop the work between manual saves. Toggle it under Settings → Editing → Use autosave.
The same panel has Use last project settings as default — when on, every new project inherits your last project's canvas, background, cursor, zoom, device frame, and audio settings rather than starting from neutral defaults. Custom presets you save are also picked up here.
Panel shortcuts
| Shortcut | Panel |
|---|---|
<kbd>⌘1</kbd> | Screen |
<kbd>⌘2</kbd> | Background |
<kbd>⌘3</kbd> | Camera |
<kbd>⌘4</kbd> | Audio |
<kbd>⌘5</kbd> | Zoom |
<kbd>⌘6</kbd> | Cursor |
<kbd>⌘K</kbd> | Add zoom at playhead |
For adding effects — text, blur regions, annotations, images — see Effects and overlays.