Getting Started
Install Screen Bolt, grant permissions, and record your first video.
Screen Bolt is a native macOS screen recorder with a built-in timeline editor. You record, it opens the editor with your clip already loaded, and you export. In between, you get auto zoom on every click, cursor effects, webcam overlays, and the kind of small production touches that usually take an hour in a general-purpose video editor. It's built for people who send a lot of screen recordings — developers, PMs, designers, support folks, founders recording demos — and don't want to think about their workflow any harder than "record, trim, ship."
System requirements
- macOS 14.0 (Sonoma) or later
- Apple silicon or Intel Mac
- Roughly 200 MB for the app itself, plus whatever your recordings end up weighing (a few hundred MB per minute at retina resolution)
- Screen Recording permission is mandatory; Microphone, Camera, and Input Monitoring are optional and only needed for the features that use them
Install
- Go to screenbolt.co and download the latest build.
- Open the downloaded DMG.
- Drag
Screen Bolt.appinto your/Applicationsfolder. Do not run it from inside the disk image — macOS auto-updates won't work from there. - Eject the DMG, then launch Screen Bolt from Applications or Spotlight.
First launch takes a second or two while macOS verifies the notarization. If Gatekeeper blocks the app, right-click it in Finder and choose Open — this only happens once.
Grant permissions
Screen Bolt asks for four system permissions. Only the first is required; the others unlock specific features. All of them live in System Settings → Privacy & Security, and you can toggle any of them later.
Screen Recording (required)
Lets Screen Bolt capture your display. Without this, nothing records.
- macOS prompts for it the first time you hit the record button.
- Grant it, then quit and relaunch Screen Bolt — the OS requires a relaunch after the grant before the app can actually capture frames.
- If denied: the record button will fail and you'll see an error. Re-enable under Privacy & Security → Screen Recording.
Microphone (optional)
Needed only if you want to record your voice alongside the screen.
- Triggered the first time you toggle the Mic button in the recording bar and press record.
- If denied: screen and system audio still record; your voice won't.
Camera (optional)
Needed for the webcam overlay.
- Triggered the first time you flip the Camera toggle on. You'll see a live preview in the recording bar once it's granted.
- If denied: the toggle will surface an error and open the Camera pane in System Settings. The rest of the app is unaffected.
Input Monitoring (optional)
Needed for keyboard sound effects — the small click sounds Screen Bolt plays under each keystroke you make during a recording. macOS treats keystroke event taps as sensitive, so this lives behind its own prompt.
- Screen Bolt asks for this on first launch with a brief explainer. If you skip it, you can enable it later from the editor's Sounds panel when you toggle Keyboard Sounds.
- If denied: every other feature works, but keyboard sounds are silent. You can grant it later under Privacy & Security → Input Monitoring — if Screen Bolt isn't listed, click the
+button and add it manually.
macOS sometimes suppresses Input Monitoring prompts silently on development-signed builds. The public notarized build from screenbolt.co surfaces the prompt reliably.
Record your first video
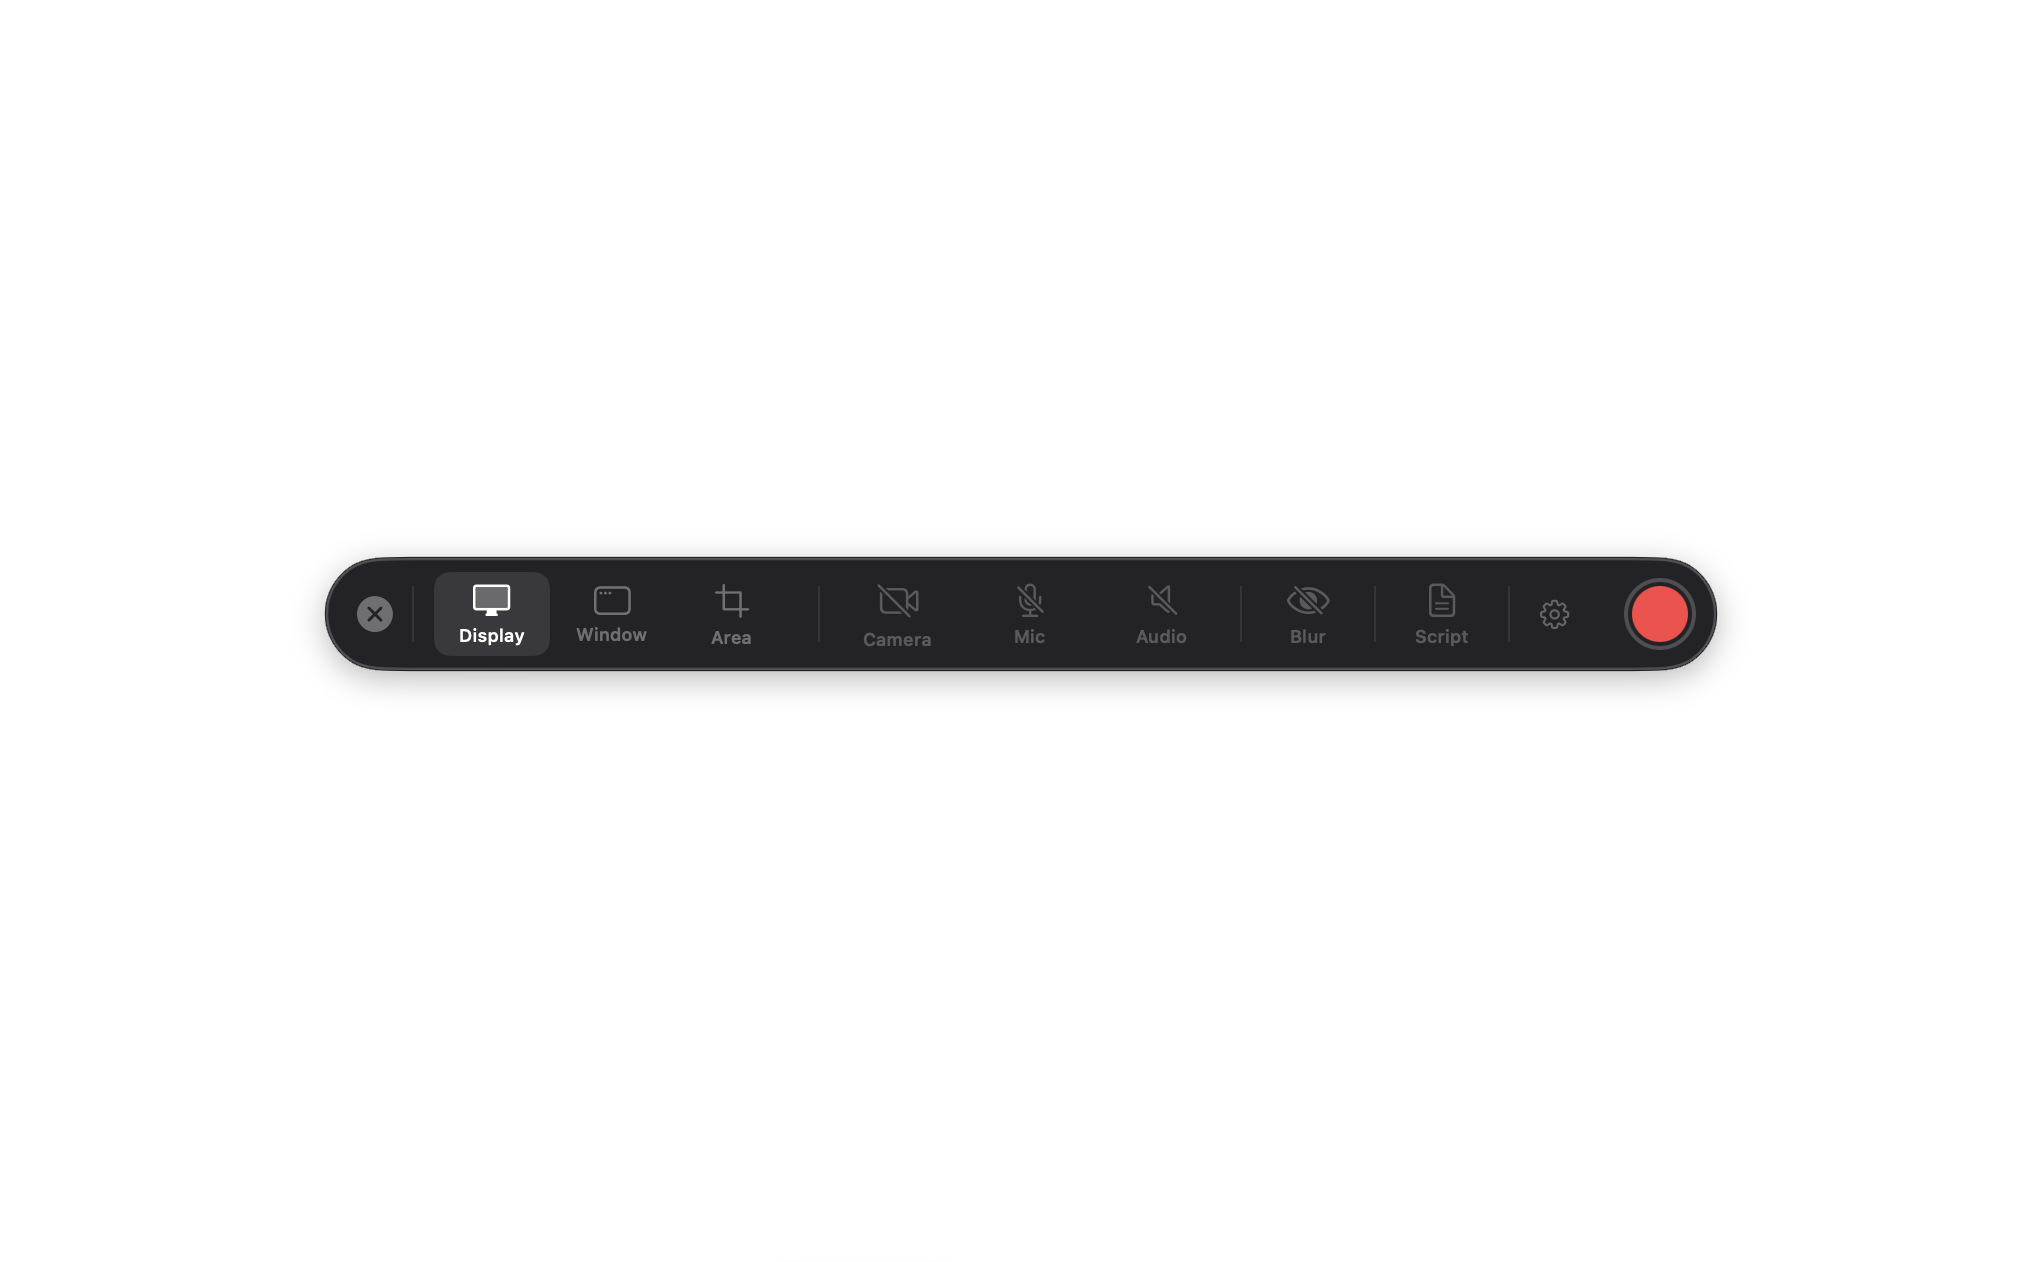
- Launch Screen Bolt. The recording bar appears — a compact floating strip with mode buttons on the left, a red record button in the middle, and input toggles on the right.
- Pick a capture mode: Display, Window, or Area. Display is the default and captures your whole screen.
- Flip on any inputs you want: Camera, Mic, and System Audio toggles on the right side.
- Click the red circle, or press
⌃⌘↵, to start. The bar shrinks to a timer during recording. - Do your thing.
- Click the stop square on the recording bar, or press
⌃⌘↵again, to finish. - The editor opens automatically with your recording, webcam, click-based auto zooms, and cursor events already wired up. From there, trim, add effects, and hit Export.
That's the whole loop.
Where recordings are stored
Every recording becomes a project folder under ~/Screen Bolt Projects/. Each folder contains:
recording.mov— the raw screen capturewebcam.mov— if you recorded the cameraproject.json— the editor snapshot so you can reopen and keep editing- Any exports you've rendered
You can change the parent folder under Settings → Recording → Save new projects to. To open the folder directly: File → Show previous projects.
If the app crashes mid-recording, the raw .mov is still in your temporary directory. Use File → Recover unfinished recordings… to pull it back.
Free vs. paid
Screen Bolt is free to download and use. The free tier has three limits designed to let you try everything before paying:
| Feature | Free | Paid |
|---|---|---|
| Watermark on exports | Yes | No |
| Export resolution | 720p max | Up to 4K |
| Export length | 3 minutes max | Unlimited |
| GIF export | No | Yes |
| Editor features | All unlocked | All unlocked |
The paid license is a one-time purchase — no subscription. Buy it from the pricing section on screenbolt.co, then enter the key under Screen Bolt → Enter License Key… (⇧⌘L).
Next steps
- Recording — every capture mode, webcam, two-camera setup, audio enhancement, teleprompter cues, and keyboard sounds in detail.
- Editing — the timeline, auto zoom, cursor effects, 3D camera moves, and webcam controls.
- Effects and overlays — backgrounds, text, annotations, blur and focus regions, image and video overlays, sound effects, transitions.
- Exporting — MP4, MOV, GIF, quality and compression presets, aspect ratios, Quick Export.
- Keyboard shortcuts — every shortcut in the app, grouped by what you're doing.