How to Make Professional Product Demos Without a Video Editor
Skip the painful editing step. Here's how to record polished product demos in one pass with auto-zoom, custom wallpapers, and export-ready effects.
I used to spend three hours editing a two-minute product demo. That's not an exaggeration.
Record the screen. Import into Premiere. Manually zoom into every click. Add a background so the raw desktop doesn't look terrible. Cut the dead air. Keyframe the motion. Render. Realize the zoom timing is off. Redo it. Render again. It was miserable - and I did it every single week for product updates.
The worst part? The final video never looked that much better than the raw recording. All that effort for a slightly smoother zoom and a nicer background. Something felt deeply broken about the workflow.
So when tools started appearing that bake the polish into the recording step itself, I paid attention. And after months of testing different approaches, I've landed on a workflow that gets me from "I need a demo" to "here's the finished video" in about fifteen minutes. No editor. No timeline. No keyframes.
Here's exactly how it works.
The old workflow was a tax on shipping
Let me paint the picture for anyone who hasn't lived this pain. You're a founder, a developer advocate, or a product marketer. You ship something new. Now you need a demo video for the landing page, the changelog, Twitter, maybe a sales deck.
You open your screen recorder. You fumble through the demo, clicking too fast in some spots, too slow in others. The raw footage looks... fine. But "fine" doesn't cut it when you're trying to convince someone your product is worth paying for.
So you open Final Cut or Premiere or DaVinci Resolve. You spend the next hour or two doing what is essentially graphic design work on a timeline - zooming into UI elements, cropping out your messy desktop, adding motion to keep things visually interesting. The actual content of your demo took five minutes to record. The polish took twenty times longer.
This is the trap. The recording is easy. The editing is where your afternoon goes to die.
What "editing in real-time" actually means
Screen Bolt takes a different approach. Instead of recording raw footage and fixing it later, you set up your effects before you hit record, and the software applies them as you go.
Three features do most of the heavy lifting:
Auto-zoom follows your cursor and automatically zooms into whatever you're clicking on. Not in a jarring, snappy way - it's smooth, like someone operating a camera who knows where to look. When you click a button in your app's UI, the viewer sees a clean zoom into that button. When you move to a different part of the screen, it pulls back out. You don't plan these zooms. You just use your app normally.
Custom wallpapers replace whatever is behind your app window. So instead of your recording showing your cluttered desktop with Slack notifications and embarrassing browser tabs, you get a clean gradient or a textured background. It sounds small but the visual difference is dramatic. Your demo instantly looks like it belongs on a landing page.
Smooth cursor is the one I didn't know I needed. It takes your actual mouse movement - which, let's be honest, is jittery and erratic when you're clicking through a UI - and smooths it into fluid motion. The effect is subtle. But put a raw recording next to a smooth-cursor recording and you'll immediately see which one looks professional.
The actual workflow, step by step
Here's what I do now when I need a product demo:
Step 1: Set up your scene. Open Screen Bolt, pick the window you want to record, choose a wallpaper that matches your brand colors, and turn on auto-zoom. This takes about sixty seconds. If I'm recording a demo where sensitive data might appear - customer names, API keys, internal dashboards - I'll turn on privacy blur for specific screen regions. It's a small thing that saves you from a very bad day.

Step 2: Do a practice run. I click through the flow I want to demo once without recording. Just to get the muscle memory. This takes maybe two minutes. I'm not scripting anything elaborate - just making sure I know the clicks.
Actually, one thing I've started doing: if the demo has talking points I need to hit, I'll load them into Screen Bolt's teleprompter. It overlays your script on screen while you record so you're not glancing at sticky notes. Feels weird the first time. Becomes indispensable by the third.
Step 3: Hit record. Go through your demo at a natural pace. Don't rush. The auto-zoom will handle the visual interest - you just need to click through the product like you're showing it to someone over your shoulder. If you mess up, just pause, back up, and redo that section. You can trim the dead spots later in about thirty seconds.
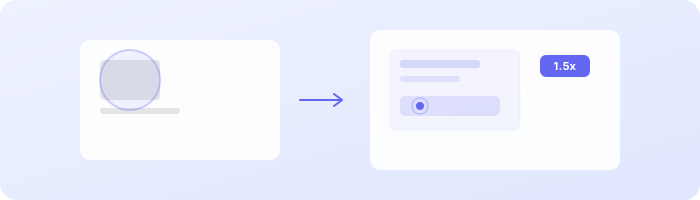
Step 4: Quick review and export. Watch the recording back. The zooms, the wallpaper, the smooth cursor - it's all already applied. If you want to add a webcam overlay (Screen Bolt supports this), you would have toggled that on before recording too. Once you're happy, export. Screen Bolt handles up to 4K at 60fps, which is more than enough for any product demo.
Total time: ten to fifteen minutes. And the output looks like you hired a motion designer.
Where this breaks down
I want to be honest about the limits. This workflow is great for product demos, tutorials, changelogs, and feature walkthroughs. It's perfect for the kind of content you produce on a regular cadence - the stuff where spending three hours in an editor every time is just not sustainable.
But if you're making a highly produced brand video with custom animations, transitions between multiple scenes, voiceover that needs to be synced to specific moments - you still need an editor for that. Screen Bolt isn't replacing After Effects for your launch trailer. That's not what it's for.
What it is for is the 90% of screen recordings that don't need a timeline editor at all. They just need to look good. And the gap between "raw screen recording" and "polished demo" used to require editing software to cross. Now it doesn't.
The real benefit is consistency
Here's what surprised me most about switching to this workflow. It wasn't just that individual demos got faster to produce. It was that I started producing more of them.
When a demo takes three hours of editing, you batch them. You wait until you have four or five things to show, then you spend a whole day in the editor. The content is always slightly stale by the time it ships.
When a demo takes fifteen minutes, you just... make one. Shipped a new feature this morning? Record a demo over lunch. It goes out the same day. Your content is always fresh, always current, and you never have an editing backlog.
That consistency compounds. Your changelog stays updated. Your sales team always has current demos. Your Twitter stays active with product content. And none of it required you to become a video editor.
Getting started
If you want to try this workflow, here's my recommendation: pick one feature of your product that you've been meaning to make a demo for. Don't try to record a comprehensive overview. Just one feature, two minutes long.
Set up Screen Bolt with auto-zoom and a wallpaper. Record it in one take. Export at 1080p. The whole thing should take under ten minutes, and the result will probably be better than what you were spending hours on before.
That's not a knock on your editing skills. It's just that the best demo is the one that actually gets made - and removing the editing step is the single biggest thing you can do to make that happen consistently.
Ready to make better screen recordings? Download Screen Bolt for Mac and see the difference in your first recording.